Easy Banana Pancakes

IMG_2714Hi guys,

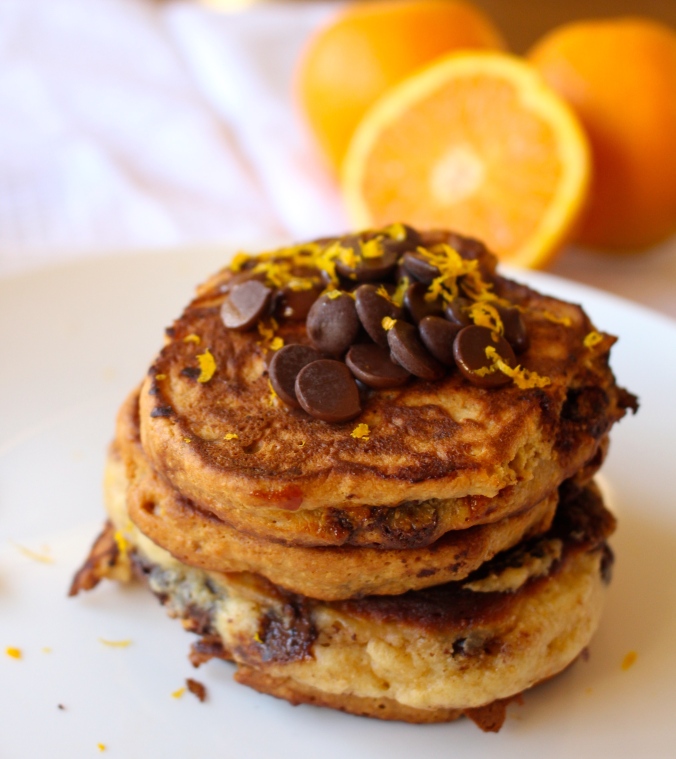
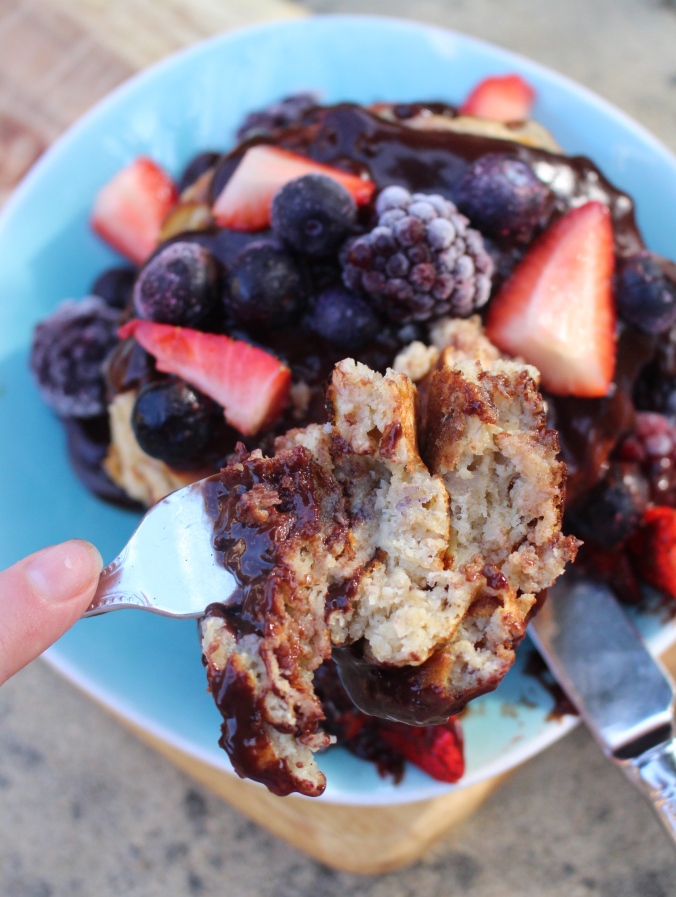
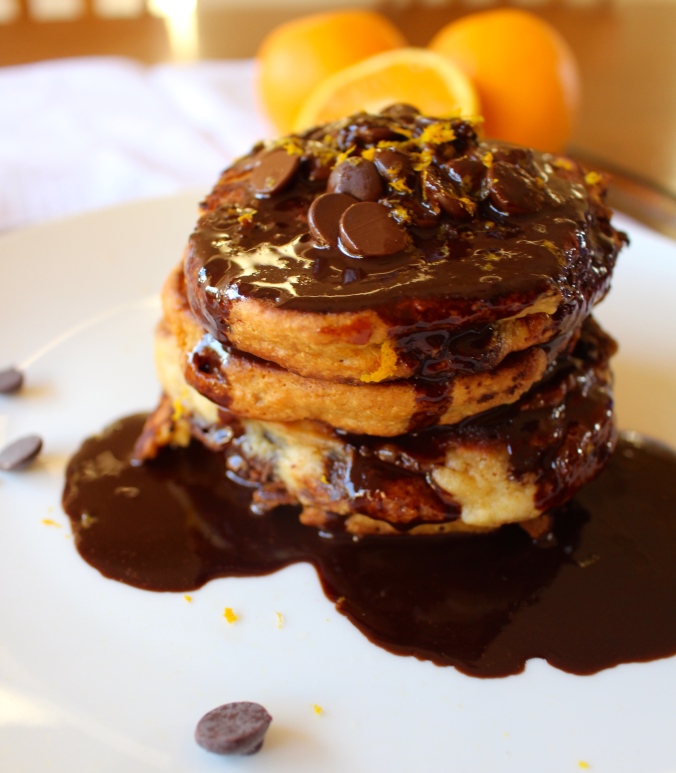
I thought I’d share another recipe on this blog for some more pancakes because you can never have too many pancakes, amiright??!

I originally saw the recipe for these on an Instagram account that I follow called real.and.wholesome a few weeks ago and have been making them non-stop since!!

What I love about these pancakes is how incredibly easy they are to make! With only a few ingredients even the worst cook could whip these up with no trouble at all. They are also extremely healthy with no refined sugar in them – the sweetness comes from the mashed banana. I like how they also contain wholemeal self-raising flour – another wholesome ingredient! This is sometimes a difficult ingredient to cook with because it can end up in the pancakes becoming really tough and not at all appetising. However, in this particular recipe it seems to work just fine and the pancakes turn out nice and fluffy like they would if you had used normal self-raising flour.

IMG_2725

I usually wake up starving and cannot be bothered making the pancake batter in the morning, then letting it rest for half an hour before waiting what seems like an eternity for the pancakes to cook, so I like to make the batter for these the day before and then just pop them in the pan to cook in the morning. This way the whole process is much easier and quicker when I wake up in the morning!

IMG_2718

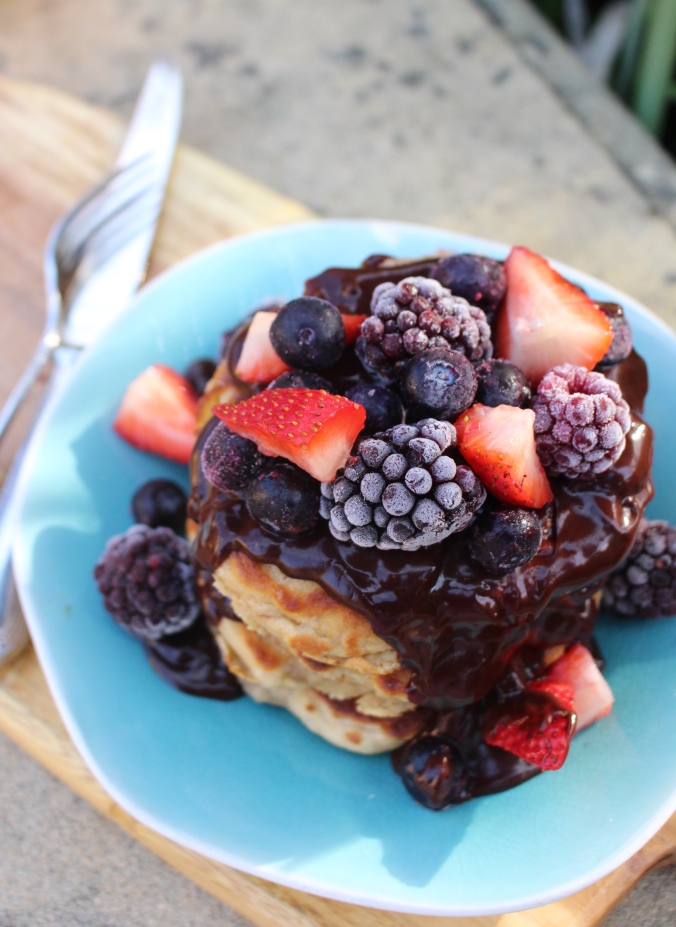
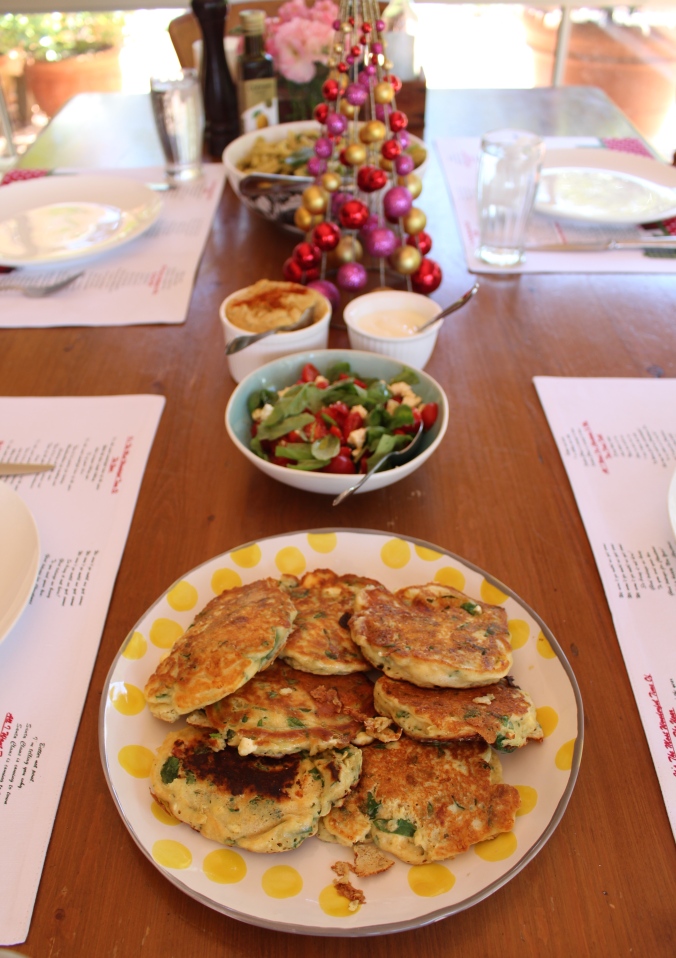
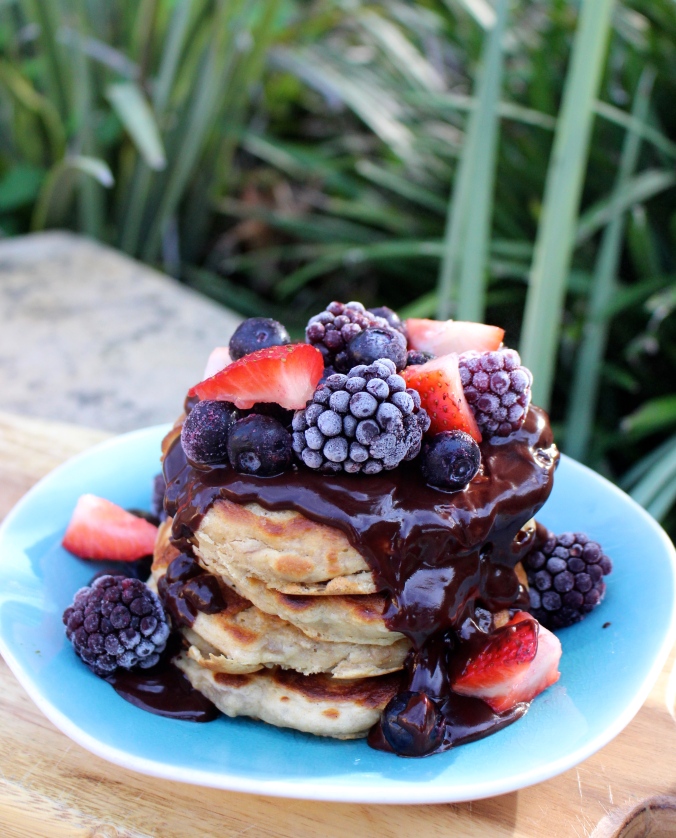
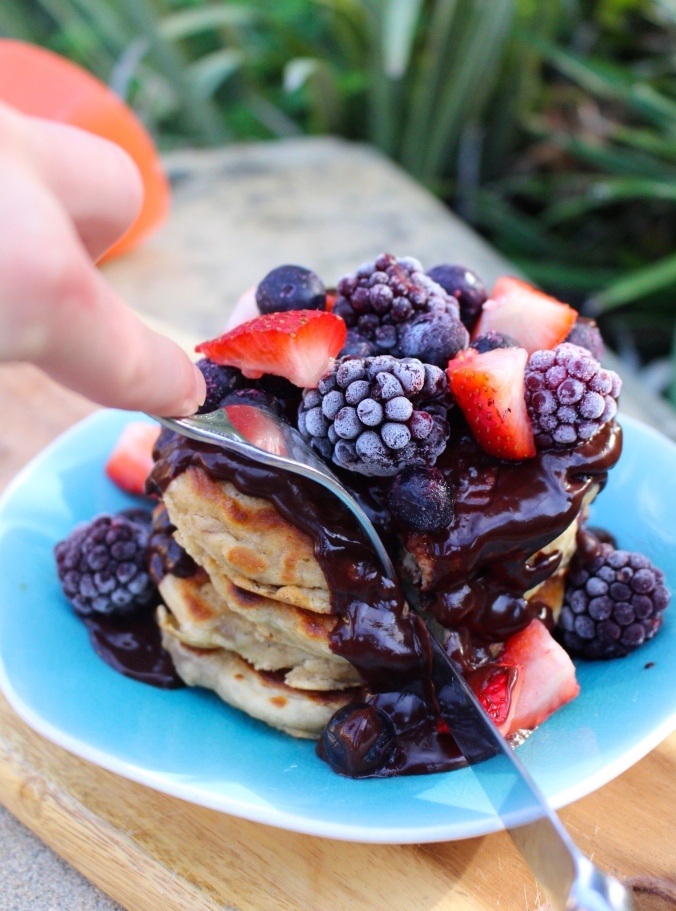
Because there is no actual sugar in the pancake mixture I like to go big on the toppings. Some of my favourite toppings are the classic maple syrup, as well as chocolate sauce, yogurt, peanut butter, Nutella and of course, fruit – I love berries and banana, especially caramelised banana! Also, the banana flavour isn’t overly strong in these pancakes because they only contain one banana so you can really go all out with the toppings.


Recipe

Easy Banana Pancakes

Makes 4 – 8 depending on size

Ingredients:

  • 1 ripe banana, mashed
  • 1 egg
  • ¾ cup milk or water*
  • ½ teaspoon vanilla extract
  • 1 cup wholemeal self-raising flour
  • ½ teaspoon baking powder
  • Pinch of salt

Method:

  1. Add the banana, egg, milk and vanilla extract to a bowl and whisk to combine.
  2. Add in the flour, baking powder and salt to the wet mixture and combine with a spatula.
  3. Melt some butter/olive oil/coconut oil in a pan over medium-low heat.
  4. Drop desired amount of mixture into the pan to form the pancake and wait until the pancake begins to bubble before flipping and cooking the other side until golden.
  5. Repeat with the rest of the mix.
  6. Serve & enjoy!

Notes:

  • * Almond milk works well too
  • * You can also use normal self-raising flour
  • Original recipe from here.
  • Normally I make about 5 pancakes

 IMG_2728

Tanisha xx

Healthy Chocolate Chip Pumpkin Bread

IMG_2585
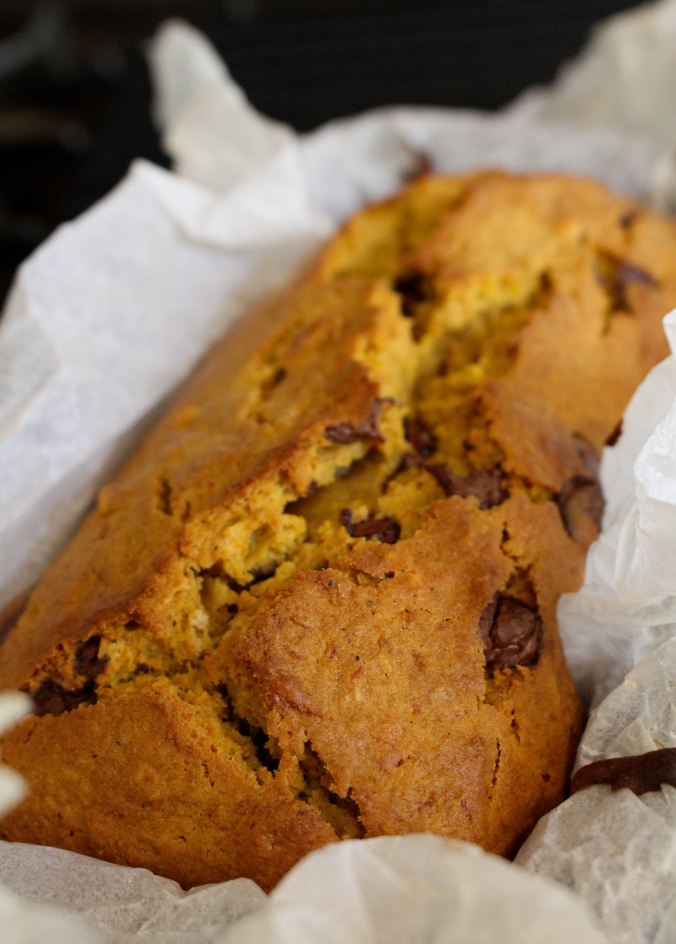
Hi, it’s been a while.

But I thought I’d share this recipe that I found yesterday. It’s not my recipe (it’s actually from Cookie and Kate) but it’s so good I couldn’t help but share it!

Never before had I heard of pumpkin bread, especially of the sweet variety. But now that I think of it pumpkin bread actually seems like a really good idea. If we’re going to get all technical about it pumpkin is actually a fruit just like banana is, so it kinda makes sense to make a pumpkin bread just like you do with banana bread. In addition, pumpkin naturally has a kind of sweet taste to it so when you roast it with honey and add in some choc chips the results are magical!

IMG_2570
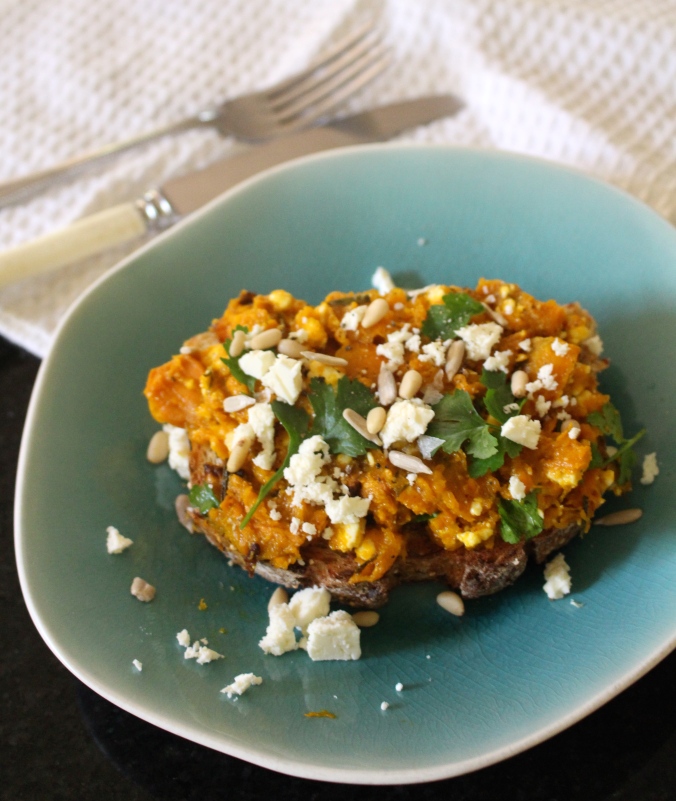
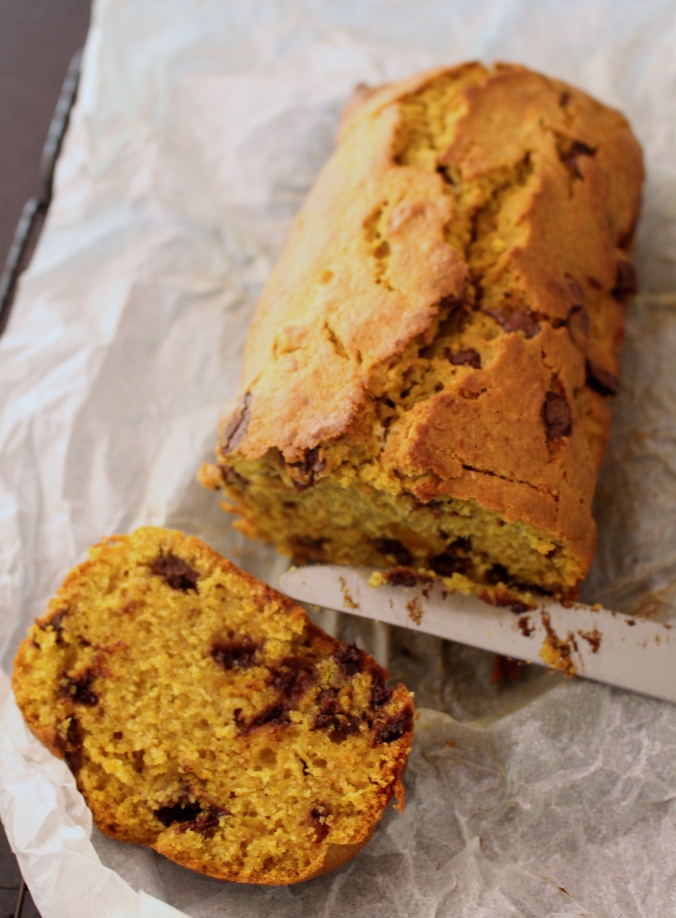
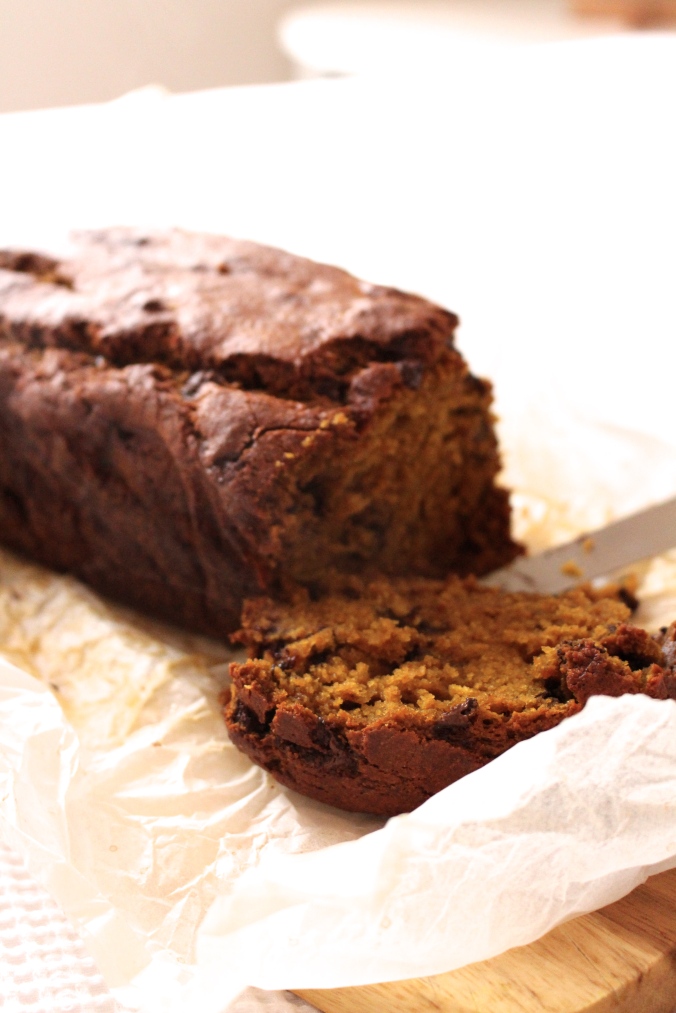
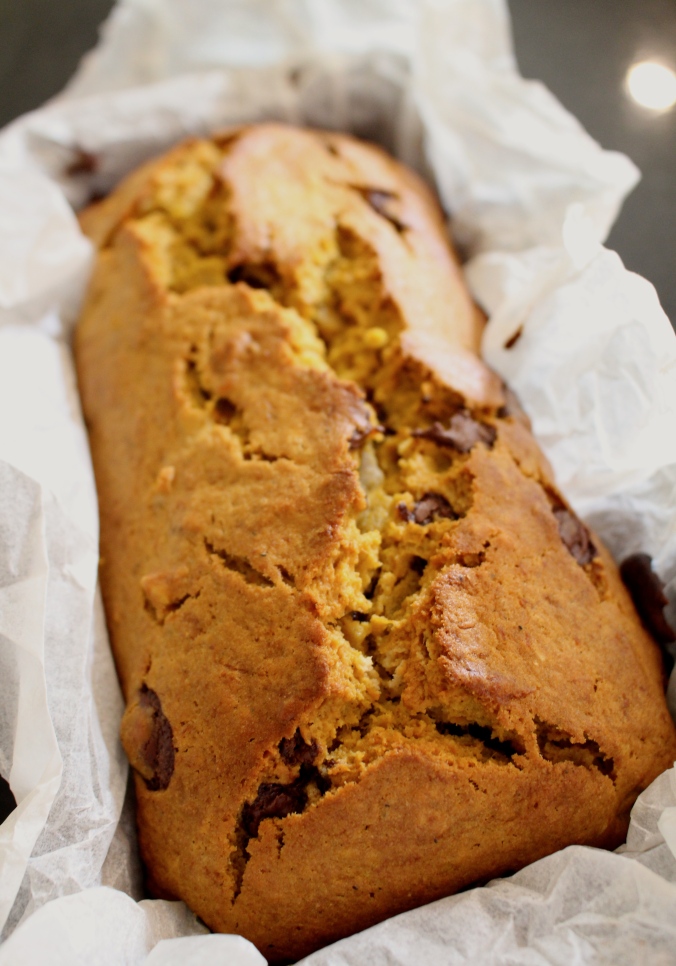
I made a few changes to the recipe which I have noted here. Nothing major just a few technicalities. Firstly, my coconut oil is always solid so I like to melt it in a saucepan with the maple syrup over low heat and then once they have melted and combined I put it in the mixing bowl and add all the other wet ingredients. And speaking of the wet ingredients, I prefer making my own pumpkin puree. What I do is I cut up some fresh pumpkin and drizzle it with some honey, then put it in the oven to roast for about 30 – 40 minutes. Once it is cooked I put it in a blender/food processor and blend it until it becomes a smooth puree. This process adds to the natural sweetness of the pumpkin puree because it is roasted with honey. However, you could probably also roast the pumpkin with maple syrup if you haven’t got honey on hand.

Obviously, I also add in dark chocolate chips because who wouldn’t want to do that??!!! But of course, if you’re a bit unusual and don’t actually like chocolate, first of all, what are you doing with your life?? Second of all, don’t worry, you don’t HAVE to add in the chocolate chips. Instead you can add in some nuts like walnuts or chopped dried fruit or nothing is you’re more of a simple guy or girl. But if you ask me, chocolate is the way to go.

IMG_2586

Recipe

Chocolate Chip Pumpkin Bread

Healthy & Refined sugar free 

Ingredients:

  • ⅓ cup coconut oil
  • ½ cup maple syrup
  • 2 eggs
  • 1 cup pumpkin puree
  • ¼ cup milk of choice or water
  • 1 teaspoon vanilla extract
  • 1 ½ teaspoons pumpkin spice blend (or ½ teaspoon cinnamon, ½ teaspoon ground ginger, ¼ teaspoon ground nutmeg, and ¼ teaspoon allspice or cloves)
  • 1 teaspoon baking soda
  • ½ teaspoon salt
  • 1 ¾ cups wholemeal self raising flour
  • ½ cup mix-ins like chopped walnuts or pecans, chocolate chips, raisins, chopped dried fruit (optional)

Method:

  1. Preheat oven to 325 degrees Fahrenheit (165 degrees Celsius) and grease (or cover in baking paper) a 9×5-inch loaf pan.
  2. In a small saucepan, add in the coconut oil and maple syrup over low heat. Allow to melt and whisk to combine. Once combined, pour into a large mixing bowl and add the eggs, milk, pumpkin puree and vanilla extract. Whisk to combine.
  3. Add all the other ingredients (except the mix-ins) into the same bowl and combine with a spatula or wooden spoon. Once combined, add the mix-ins.
  4. Pour the batter into your greased/lined loaf pan.
  5. Bake for 55 to 60 minutes, or until a toothpick inserted into the center comes out clean
  6. Let the bread cool in the loaf pan for 10 minutes, then transfer to a wire rack to cool for 20 minutes before slicing.

Notes:

IMG_2557

That’s all for today folks,


Tanisha xx


P.S. I made this recipe again today (the first time I made it was yesterday) and I cooked it for a bit longer. Look how much difference a little bit of lighting and a longer time cooking can make to it’s colour!

IMG_2609

Traditional Hot Cross Buns

IMG_2158

Hi all,

Today I bring you a delicious hot cross bun recipe from The Cook and Baker just in time for Easter – lucky you!!

Hot cross buns are definitely one of my favourite things about this time of the year and as a kid I would always look forward to tucking into some warm buns after school.

I’ve always thought that they would be so hard to make, until last year when I actually tried making some dark chocolate cranberry ones and to my surprise they weren’t actually as difficult as I had always imagined! The only downfall is that they just take a little longer to prepare than most things with all the resting of the dough but all the wait is definitely worth it when you finally eat them fresh out of the oven – so good!! And they are definitely so much better than the store bought ones so it’s not that bad after all!

This year my mum made the more traditional variety of buns laced with spices and dried fruit rather than the chocolatey version I made last year. I’m sure even those who fall into the choc chip hot cross bun lover’s club will also like these. They are perfect warm and slathered in melting butter or however else you may like them.

Just remember that because these are made fresh and don’t contain any preservatives etc. they do go stale very quickly. So try to eat as many as you can in the first day you make them (I’m sure you’ll have no trouble with this)!! Or if you think you aren’t up to the challenge just freeze some for later.

 IMG_2165

Recipe

Traditional Hot Cross Buns

Makes about 18

Ingredients:

  • 200g sultanas
  • 250 ml Earl Grey tea, strong and hot
  • 250 ml skim milk
  • 10g dried yeast
  • 110g caster sugar
  • 1 egg, at room temperature, lightly beaten
  • 860g strong (bread) flour
  • 2 tablespoons mixed spice
  • 1 teaspoon salt
  • 85g butter, softened
  • 130g dried apricots, diced
  • 4 tablespoons plain (all-purpose) flour & 1 tablespoon caster sugar – for piping paste
  • 110g caster sugar – for glaze
  • Butter, to serve

Method:

  1. Soak the sultanas in the tea from 30 mins, then drain thoroughly.
  2. Preheat the oven to 180 degrees C. Line a baking tray with baking paper.
  3. In a medium saucepan, warm the skim milk and 200 ml water to 30 degrees C on a thermometer, then remove from heat. Add the yeast, sugar and egg and stir until the yeast is dissolved. Set aside.
  4. Sift together the flour, mixed spice and salt into the bowl of an electric stand mixer fitted with a dough hook attachment. Add the softened butter and the yeast mix. Knead on a low speed until just incorporated. Turn the speed to medium and mix for 8 mins. Add the fruit and knead until all fruit is evenly distributed through the dough, approximately 1 – 2 minutes.
  5. Remove the dough to a lightly floured surface and knead for 1 minute. Form a ball, and place the dough into a large, lightly greased bowl, then cover with a plastic wrap and leave in a warm place to prove for approximately 45 minutes or until doubled in size.
  6. Divide into 18 equal pieces and roll into taut balls. Place on the prepared tray, allowing room for spreading. Cover loosely with plastic wrap, leave in a warm place to prove for 45 minutes until doubled in size.
  7. For the piping paste: in a small bowl, mix the flour with the sugar and 60 ml water until smooth. Fill a piping (icing) bag with the paste and pipe crosses on top of the buns.
  8. Bake for 20 – 25 minutes until golden brown and the buns sound hollow when tapped on the base.
  9. To glaze: in a small saucepan, dissolve the sugar and 50ml water and bring to the boil. Brush this glaze over the buns.

Notes:

  • Best eaten on the day or can be toasted up to 2 days later.
  • Eat with lashings of butter!
  • Original recipe from here.

IMG_2174

Happy Easter! I hope you all enjoy the day whether you celebrate it or not. It is a holiday so remember to relax and treat yourself a little. All your hardwork will not be undone from one day of bad eating or whatever it may be that concerns you.

Tanisha xx


Peanut Butter Cookie Dough Bliss Balls

IMG_2053
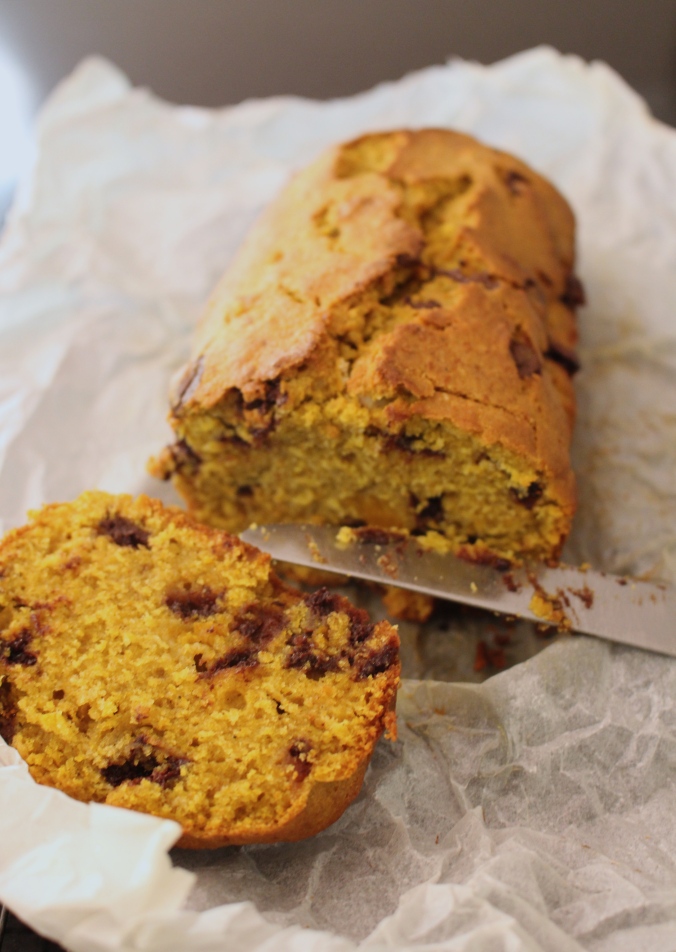
Wowee it’s been a while since I’ve posted anything on here. What can I say? Life just got in the way!

But first, hold your horses fam.

These are yum. Like, really yum.

I mean it does consist of the deadly combination of peanut butter and chocolate so there’s really minimal room for non-yumminess but I’m being 100% trueful when I say they’re good. If you like peanut butter and chocolate then you will no doubt like these. (By the way, I’m really sorry if you don’t like peanut butter, because nearly all my meals involve it. Whoops.)

IMG_2042

These are great for an afternoon pick-me-up or after dinner sweet and they’re also great for your health too so it’s a win-win!

Of course I did not come up with this surprisingly easy recipe, as much as I would have loved to. I actually got it from Wholefood Simply. So all creds to you! What a star!

Anyways here’s the recipe because that’s really what you guys all came here for.

IMG_2050

Recipe

Peanut Butter Cookie Dough Bliss Balls

 Makes ~ 7

Ingredients:

  • 1 ¼ cups almond meal
  • 4 tablespoons peanut butter
  • 3 tablespoons honey (or rice malt syrup)
  • 1 teaspoon vanilla extract
  • Pinch of salt*
  • 40 grams dark choc chips

Method:

  1. Add all the ingredients except the choc chips into a blender and blend until smooth.
  2. Add the choc chips and mix to combine.
  3. Using hands, roll mixture into balls and place in the fridge or freezer to set.

Notes:

  • Try to choose a peanut butter that is quite runny – I recommend Mayver’s – as this will help with the consistency.
  • If you find the batter is not wet enough just add a little bit of water until it reaches your desired consistency.
  • *If the peanut butter already contains salt omit the salt altogether.
  • Recipe from here.

IMG_2056

That’s all folks!


Tanisha xx

Trail Mix Granola

img_1743Yum. Yum. Yum, with a capital Y.

This is the kind of granola that you eat out of the jar because it’s that good. Until you realise that there’s none left and you only made it yesterday…..oops (story of my life).

I love this granola especially because I’m going through a sort of phase where I’ll eat anything with cashews in it. For some unknown reason I hadn’t eaten them in ages and then the other day I decided to buy them and by golly, they’re good! (Also, because it has chocolate chips and craisins in it, and it’s really clusterific and you all know I love clustery granola) – sorry that was a really long sentence.

img_1708
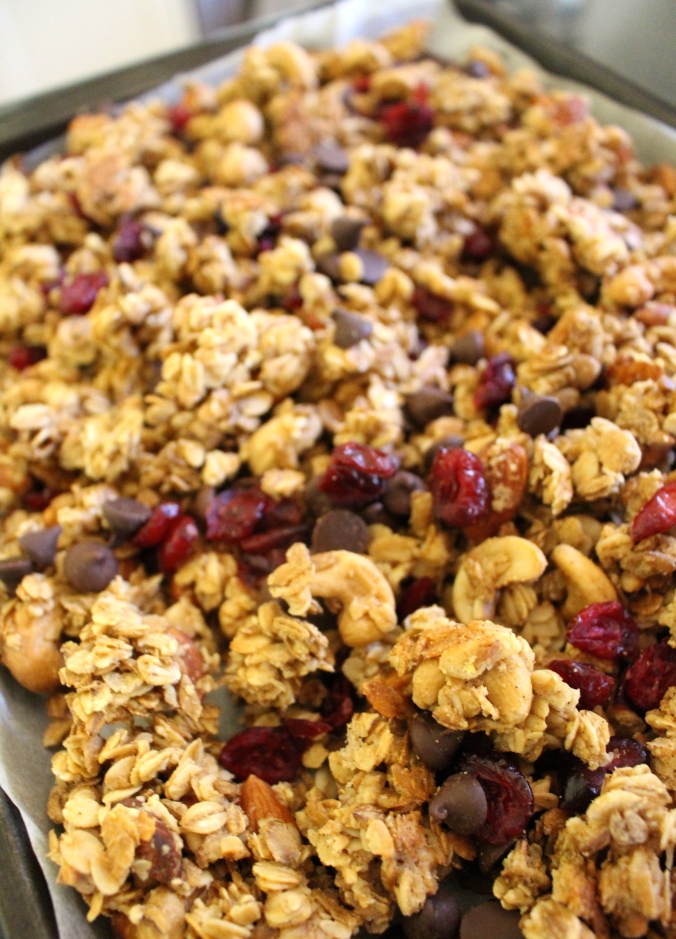
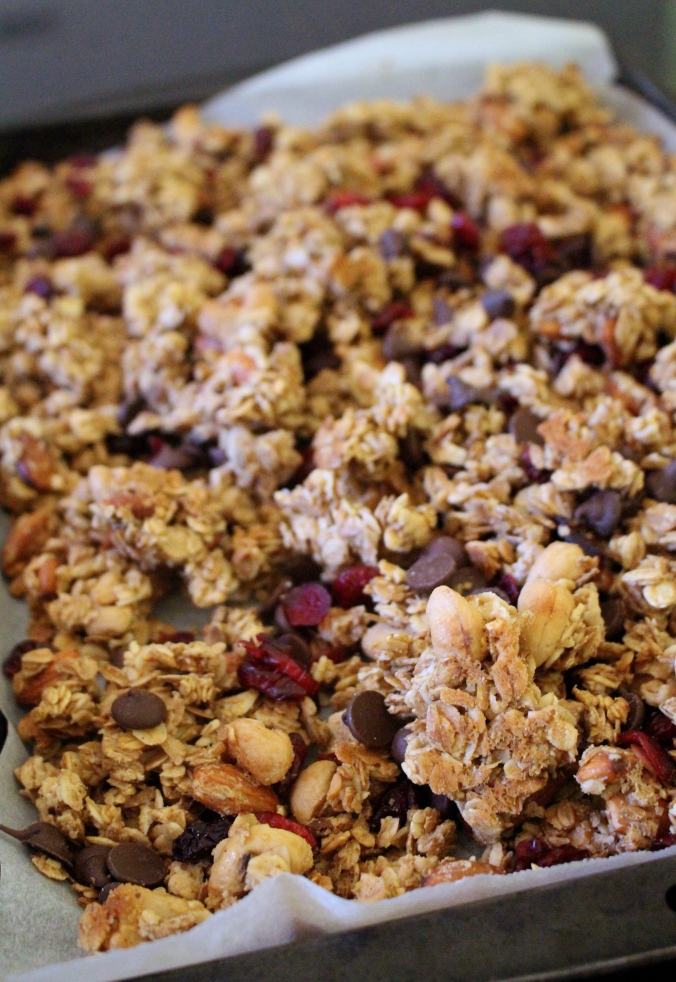
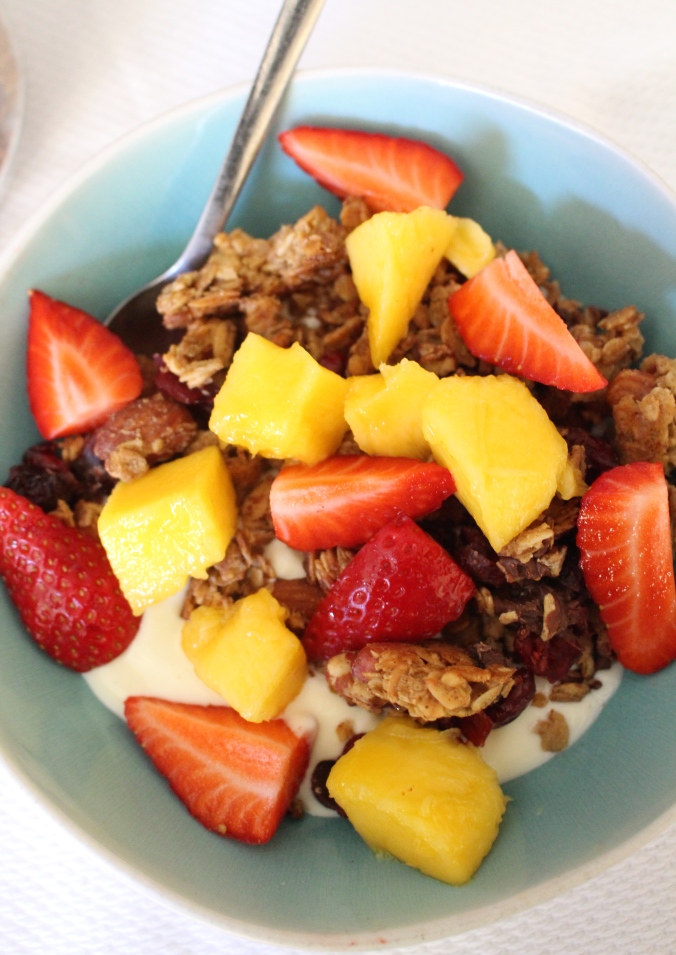
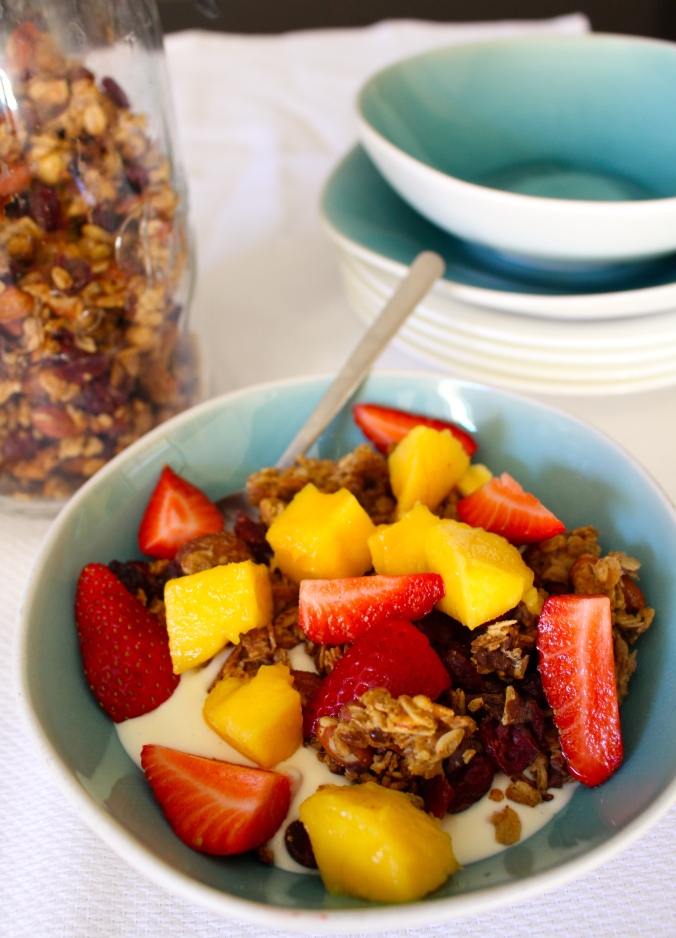
If you scrolled down to see the recipe, you’re probably wondering why there’s egg white in it. What a random ingredient to have in granola, right?! Wrong! Along with the nut butter, the egg white works to create those perfect little clusters that make this granola so good. Without it the granola would be, well…muesli.

Also, I almost forgot to tell you guys – over the next two months I am on exchange in Italy so I sincerely apologise in advance if I am a bit slack in posting recipes. Hopefully when I get back I will have some authentic Italian recipes up my sleeve!

img_1741

Something I will miss a lot over the next two months will definitely have to be my homemade granola. I make one or two batches every weekend when I am home so it will definitely be quite weird for me without it.

Anyways, here’s the recipe so you guys can make it for me

img_1733

Recipe

Trail Mix Granola

Ingredients:

  • 3 cups rolled oats
  • ¾ cup whole unsalted almonds
  • ½ cup whole cashews
  • ½ teaspoon ground cinnamon
  • ½ cup maple syrup
  • ¼ cup coconut oil
  • ¼ cup almond or peanut butter
  • 1 egg white
  • 1 teaspoon vanilla extract
  • 1 cup dried cranberries (craisins)
  • ½ cup dark chocolate chips

Method:

  1. Preheat oven to 150C (300F) degrees. Line one large baking sheet with parchment paper or a silicone baking mat.
  2. Toss the oats, almonds, cashews, and cinnamon in a large bowl. Set aside.
  3. In a medium heat-proof bowl, microwave the maple syrup, coconut oil, and almond butter together for about 30 seconds. Alternatively, you may melt these ingredients together in a small pan on the stovetop. Remove from the microwave and using a fork or rubber spatula, stir until everything is melted together and smooth. You may need to microwave it for 10 more seconds or so. Allow to cool down for about 5 minutes (you don’t want to cook the egg white!). Once slightly cooled, whisk in the egg white and vanilla.
  4. Pour over the oats and toss to coat. Make sure all of the oats are moistened.
  5. Spread onto the prepared baking sheet (it usually always fits onto just one– if too crowded, use two baking sheets and bake at the same time on different racks) and bake for 45 minutes, stirring every 15 minutes.
  6. Remove from the oven and allow the granola to cool completely – the air will help the granola obtain a crunchy texture. Once cooled, toss in the dried cranberries/raisins and chocolate chips.

Notes:

 img_1699

Until next time,


Tanisha xx


Cacao and Coconut Bliss Balls

img_1033

These are my fail-safe bliss balls.

I make them all the time because they’re so bloody easy to make that you really cannot go wrong (and they also taste good too)!

Plus they’re good for you.

What more could you want?!

img_1031

These are best eaten when they’re refrigerated and are perfect for snacking on when you’ve got the munchies!

Enjoy!

img_1042

Recipe

Bliss Balls

Makes approx. 8

Ingredients:

  • 1 cup almond meal
  • 2 tablespoons desiccated coconut, plus more for rolling
  • 2 tablespoons coconut oil, melted
  • 1 ½ tablespoons cacao powder
  • 1 teaspoon vanilla extract
  • 10 medjool dates, torn

Method:

  1. In a food processor, combine all of the ingredients. If the mixture is too dry you may need to add a tablespoon or two of water.
  2. Roll the mixture into balls using your hands, then roll in the extra desiccated coconut.
  3. Refrigerate the balls.

Notes:

  • This recipe can be easily halved, doubled or tripled.

Recipe based on Raw Chocolate Almond Balls

img_1030

Tanisha xx


Jaffa Pancakes

IMG_7144
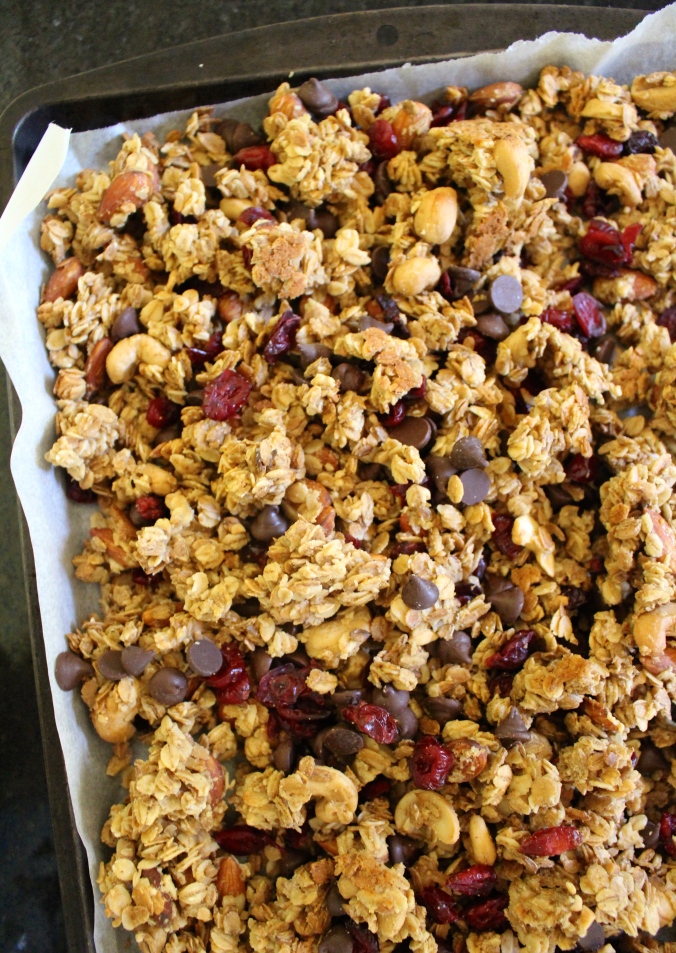
Hollaaaa people! It’s been a while but I’m back with a fab recipe to boot!

I’ve been meaning to post this recipe for a while now but you know, life just gets in the way sometimes. After all, it’s a breakfast item (and we all know I love them), it’s pancakes, it’s got chocolate in it, it’s healthy and it’s just damn delicious.

These are the perfect pancakes for a Sunday morning (or just whenever) if you’re feeling indulgent but still want to be healthy. They might even be a good breakfast for Father’s Day coming up (hint, hint)!

Hope you enjoy!

Recipe

Jaffa Pancakes

Serves 2

Ingredients:

  • 1 ¼ cup wholemeal flour
  • 1 teaspoon baking powder
  • ¼ teaspoon baking soda
  • ¼ teaspoon salt
  • ½ cup greek yogurt
  • ¼ cup milk
  • 1 large egg
  • 1 tablespoon coconut oil
  • 1 ½ tablespoons honey
  • ½ teaspoon vanilla extract
  • ¼ cup orange, juiced
  • ½ orange, zest (plus extra to serve)
  • ½ cup chocolate chips (plus extra to serve)

Dark Chocolate Sauce (optional)*:

  • 2 tablespoons coconut oil
  • 1 tablespoon maple syrup
  • 1 ½ tablespoons cacao powder
  • ½ teaspoon vanilla extract

Method:

  1. In a small mixing bowl combine the flour, baking powder, baking soda, and salt.
  2. In a separate large mixing bowl whisk together the greek yogurt, milk, egg, coconut oil, honey, vanilla extract, and orange zest and juice.
  3. Add the dry ingredients to the wet ingredients and mix until just combined. Be sure not to over mix the batter. Gently fold in the chocolate chips.
  4. Heat a large frypan with butter or coconut oil to low heat.
  5. Using a large spoon or small cup, scoop the batter from the bowl and drop onto the frypan. Once the top of the pancake begins to bubble and the edges look set, flip and cook for another 2-5 minutes. Repeat with remaining
  6. Serve with extra chocolate chips, oranges and chocolate sauce or maple syrup!

Notes:

  • If you want an extra chocolatey batter you could add 2 tablespoons of cacao powder to the batter. Add it in at step 2.
  • For the chocolate sauce I used http://www.forkandbeans.com/2012/09/11/raw-chocolate-sauce/, except I halved the recipe so that it would serve only 2 people.
  • * Instead of the chocolate sauce you could just melt some dark chocolate chips for a much easier recipe.

IMG_7116

I warn you: the dark chocolate sauce is certainly not for the faint hearted. It has a very strong, almost bitter taste so if you are not a big fan of dark chocolate I would recommend you leave it out. But never fear, these pancakes go great with maple syrup so you’re not missing out on anything by leaving it out.


Tanisha xx

Smashed Pumpkin Bruschetta

IMG_8238

Move over smashed avo, there’s a new guy in town who’s taking the steady stream of trendy hipster cafes by storm.

And who would that be?

Why, smashed pumpkin of course!

And I’m loving it.

What’s more to love than a big, thick slice of toasted sourdough bread topped with a copious amount of warm, hearty, and subtly sweet smashed roast pumpkin on a cold winters day – geez could I have added any more adjectives to that sentence!

IMG_8255

So today I am going to share a recipe for a suitably delicious smashed pumpkin that takes so little effort to prepare and make that you won’t need to set foot in another cafe  ever – that may be a slight exaggeration.


As soon as I saw this recipe on The Healthy Hunter, I just knew I had to make it immediately. It sounded so warm and inviting, and luckily, I had all the ingredients at home so there was no need to rush to the shops.

As usual, I have added a few ingredients to this recipe but, in this case, it has been extremely minimal, as I felt that the original recipe was pretty close to perfect!

Nonetheless, I added a sprinkling of pine nuts on top for an extra depth of flavour and texture (but this is by no means required, given that there is already sunflower seeds), I didn’t use any spring onion simply because I didn’t have it although I have included it in the recipe because I thought it would be a worthwhile addition, I used rosemary as I had no thyme, and I omitted the rocket.

Oh, and I increased the serving size of the original recipe because 1 slice was nowhere near enough for me!

IMG_8244

Recipe:

Smashed Pumpkin Brushetta

Serves 1 or 2 (small)

Ingredients:

  • 300g butternut pumpkin, roughly chopped into 3cm pieces, skin off.
  • 1 ½ tsp olive oil
  • A small handful of fresh thyme or rosemary
  • 1 tbs spring onion
  • 1 small handful of feta, crumbled
  • A few sprigs flat leaf parsley
  • Pepper and salt
  • 2 x slice of toasted sourdough bread
  • 1 tsp sunflower seeds toasted
  • 1 tsp pine nuts toasted

Directions:

  1. Preheat oven to 180 degrees celsius.
  2. Toss pumpkin with 1/2 the olive oil and 1/2 the thyme (or rosemary) and transfer to a parchment paper lined baking tray. Bake for 30 minutes or until soft and cooked through.
  3. Combine the cooked pumpkin, most of the feta, spring onion, remaining thyme (or rosemary), oil, parsley and a pinch each of salt and pepper, roughly mash.
  4. Spread the pumpkin mix on the toasted sourdough and top with the remaining parsley, feta, sunflower seeds, pine nuts, and salt and pepper.

Notes:


Hope you enjoy!

Tanisha xx

Mum’s Apple Crumble

IMG_7817

It’s Mothers Day after all, so I feel as though I should post one of my mums best recipes: the humble crumble – I did not plan that (just saying)!

Autumn is well under way here in Perth and things are really starting to cool down. Which means that all things food are starting to heat up!

One thing, I love about winter is the food. I adore a good curry, soup, risotto, or warm cake or pudding. But one meal in particular stands out, and that would have to be my mums crumble! That has to be one of my favourite desserts ever (only behind cheesecake)!! Especially when it’s paired with homemade custard – now that’s next level!

I have posted a crumble recipe before but that was more of a healthy, modern crumble recipe by Donna Hay, however, this one is very traditional. The only thing different to most of the recipes you guys make at home is that I decided to use Amy’s Grains instead of oats in this recipe to add a little bit more of some wholegrain goodness in there!

This recipe is solely my mums so I owe all the credit to her. She is one of those people who just chucks random estimated amounts of ingredients into a recipe and it always seems to work out just perfectly. I seriously don’t know how she does it because if I tried that it would not end well, let me tell you!! As a result, the quantities of the ingredients in this recipe are merely a guide and crumble is a fairly forgiving recipe so do not stress out too much if you don’t have the correct amount of ingredients!

Nonetheless, happy cooking!

IMG_7789

Recipe:

Mum’s Fruit Crumble

Serves 4 – 6

Ingredients:

  • 8-10 apples*
  • 2 – 3 tablespoons caster sugar*
  • Cinnamon quill (optional)
  • Vanilla bean (optional)
  • ¾ cup Amy’s Grains or rolled oats*
  • ¾ cup plain flour
  • ½ cup coconut
  • 125 grams chilled butter
  • ½ cup caster sugar

Method:

  1. Preheat the oven to 180 degrees.
  2. Peel, core and chop the apples. Place them in a casserole dish, along with the cinnamon quill and vanilla bean, and sprinkle with the sugar. Bake in oven until softened but not soggy – about 30 minutes.
  3. Meanwhile, combine all the dry ingredients together. Rub the butter into the dry mixture with fingertips until it resembles breadcrumbs. Add more butter if need be.
  4. Once the apples are cooked pour over crumble mixture and return to oven.
  5. Cook for 30 minutes until golden brown and crunchy.
  6. Serve with homemade custard or some ice cream!

Notes:

  • * Apples can be substituted for most other seasonal fruits. I recommend pear, nectarines, plums, apricots, rhubarb or berries.
  • * For a softer more fudgier crumble topping use brown sugar. Caster sugar creates a more crunchy topping.
  • Just a little reminder that you can get 20% off anything on the Amy’s Grains and Eating Fit website with my promo code AMYe7ec.

IMG_7813

Also, I’d like to wish a very big Happy Mothers Day to all the mothers out there! I hope your day was as wonderful as this crumble is!!


Tanisha xx

Hummus Your Heart Out + Recipe

IMG_6981

Hummus, humus, houmous, hommos, hommus, huomos.

However you spell it hummus is still hummus. Who would have guessed? – I think I’ll have to give that sentence of the year right there!!

Anyway…..

The other day I was contemplating my great love for hummus and I came to the inevitable question, ‘what would the world be like without hummus?” or probably more accurate, “what would MY world be like without hummus?” The answer, you may ask (or probably not because you don’t really care – well I’ll tell you anyway) is that the world would be bleak and flavourless from the absence of this wondrously chickpea filled dip. Yuck. What a world that would be!

Thank god for hummus!

In case you haven’t realised, I LOVE LOVE hummus. I would probably even marry it if I had to. But then again, I would probably also marry peanut butter, chocolate, granola, fluffy pancakes, dhal, mango and gnocchi amongst other things so that’s not really a big deal. I digress, though.

The whole point of my aforementioned ramblings was just to showcase my love for hummus to you sll and to say that I hereby sanctify hummus as the King of All Dips!

Thank you, thank you very much….


IMG_6986

Hummus goes great as part of a picnic or family lunch!


Recipe

Hummus

Ingredients:

  • 1 can (400g) chickpeas*
  • 1 tablespoon tahini
  • 3 cloves garlic, crushed
  • 1 – 2 lemons, juiced (depending on how juicy they are)
  • 3 teaspoons ground cumin
  • 1/3 cup good quality olive oil
  • About 11/2 teaspoons sea salt
  • A little bit of water
  • Cumin, paprika and parsley leaves for serving (optional)

Method:

  1. Drain the water from the chickpeas and rinse thoroughly. Tip into a food processor, along with tahini, garlic, lemon juice and cumin. Turn the food processor on and slowly pour in the olive oil in whilst it is running.
  2. Once fully combined and smooth, season with salt and, if needed, add in a little bit of water to achieve the right consistency. Turn the food processor on again and blitz until combined.
  3. Pour hummus into a serving dish and sprinkle on some more cumin, paprika and parsley leaves.

Notes:

  • *For best results you can cook some dried chickpeas and then use them instead of the tinned chickpeas.
  • This recipe can easily be doubled to make an extra big batch if you so wish.
  • To serve: alternatively you could pour on some more olive oil and scatter a few whole chickpeas on top of the hummus.


I would just like to mention that this recipe is by no means traditional it is simply a recipe that has been passed down to me from my mum.

I have noticed that many traditional hummus recipes are really heavy on the tahini but I prefer to make mine with less tahini and more cumin, garlic and lemon for maximum flavour.


Tanisha xx